
Adobe I/O Integrations for Adobe Analytics 2.0 APIs
published onThe first steps to accessing Adobe Analytics 2.0 APIs - a guide to creating integrations in Adobe I/O using your public key certificate details
Migrating your service account applications from Adobe's 1.4 APIs to the newer 2.0 APIs isn't exactly a walk in the park. So grab a large cup of coffee, make sure you're sat comfortably, and if you need to use the bathroom - you should go before we set off.
In previous versions, you could generate a WSSE header using your Web Service Credentials - two pieces of information unique to your login, Username and Shared Secret, available to an Adobe Analytics administrator. Simply create your header, include it in the request to the API, and the API responds with your data.
Alternatively, a 'client_credentials' type OAuth application could be used. An Adobe Analytics administrator creates the application - setting the allowed scopes (Report, Segments, Company etc...), and this returns two pieces of information unique to the application, Application ID and Application Secret. Pass these in the body of a request to the https://api.omniture.com/token endpoint and Adobe responds with an access token, which serves as authentication when included in your request to the API.
Rough steps to return data from the Adobe 2.0 APIs for the first time are as follows:
- Create an Adobe Analytics Product Profile in Admin Console
- Create an RSA Private Key and Public Key Certificate
- Create an integration in Adobe I/O using your previously generated Public Key Certificate, and Analytics Product Profile. This will provide you with the following unique credentials: API Key, Technical Account ID and Client Secret, along with a reminder of your Adobe Organisation ID
- Use the API Key and Technical Account ID, along with your Adobe Organisation ID, Private Key and an API specific metascope string to generate a JSON Web Token (JWT).
- Use the API Key and Client Secret, and exchange your previously generated JWT for an Access Token at
https://ims-na1.adobelogin.com/ims/exchange/jwt - Use your API Key and Access Token to return your Global Company ID from
https://analytics.adobe.io/discovery/me - Use your Global Company ID to identify your company specific API endpoint
- Use your API Key, Adobe Organisation ID, Global Company ID and Access Token in the header of the request to the API endpoint.
- Reflect on the terrible life choices you made that led you here. (Optional)
In this post we'll explore how to generate your private key & public key certificate, and create the integration in Adobe I/O. For authentication steps, see post two in this series, and for navigating the 2.0 Reporting API, see the final post in the series.
2.0 APIs firstly require a Systems Administrator for your Adobe organisation (so not just a standard Analytics administrator) to create an integration in the Adobe I/O Console. If you fit that description, head over to https://console.adobe.io/integrations and hit the New Integration button.

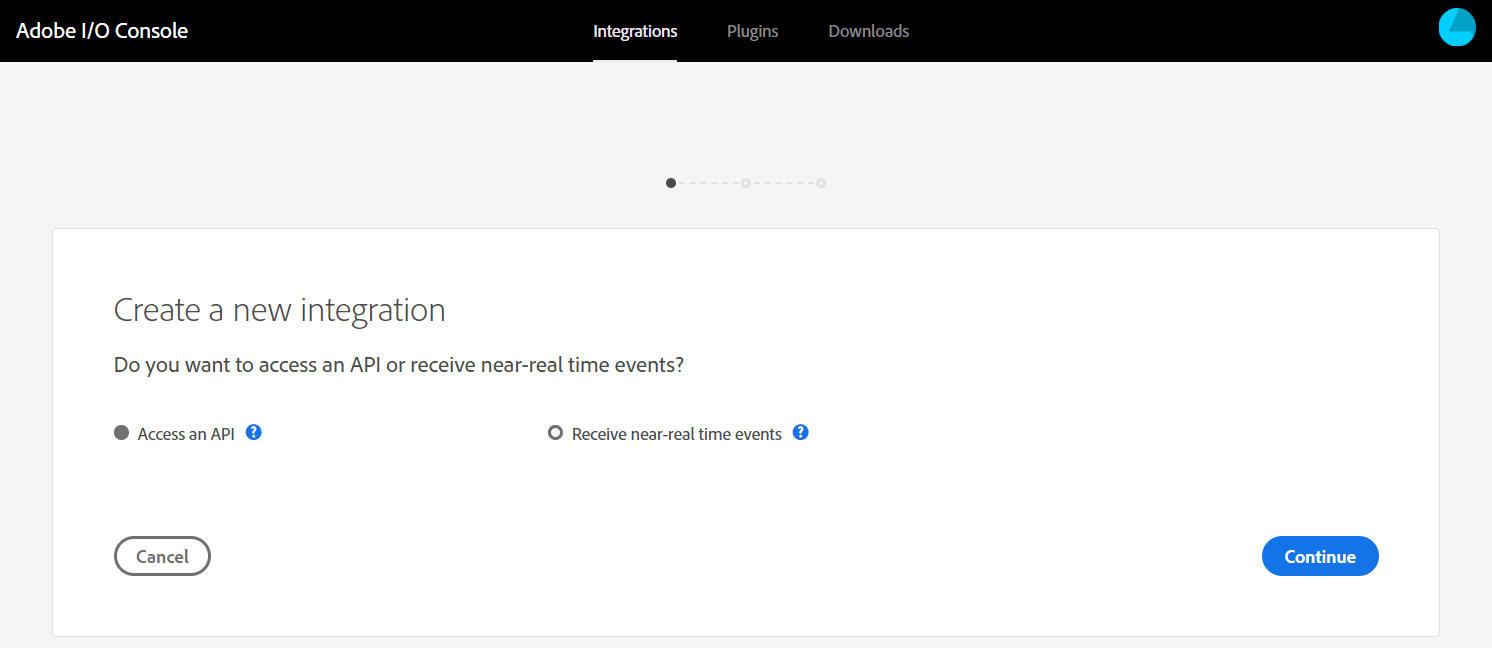
On the following page - Create a new integration, leave Access an API selected and click Continue.
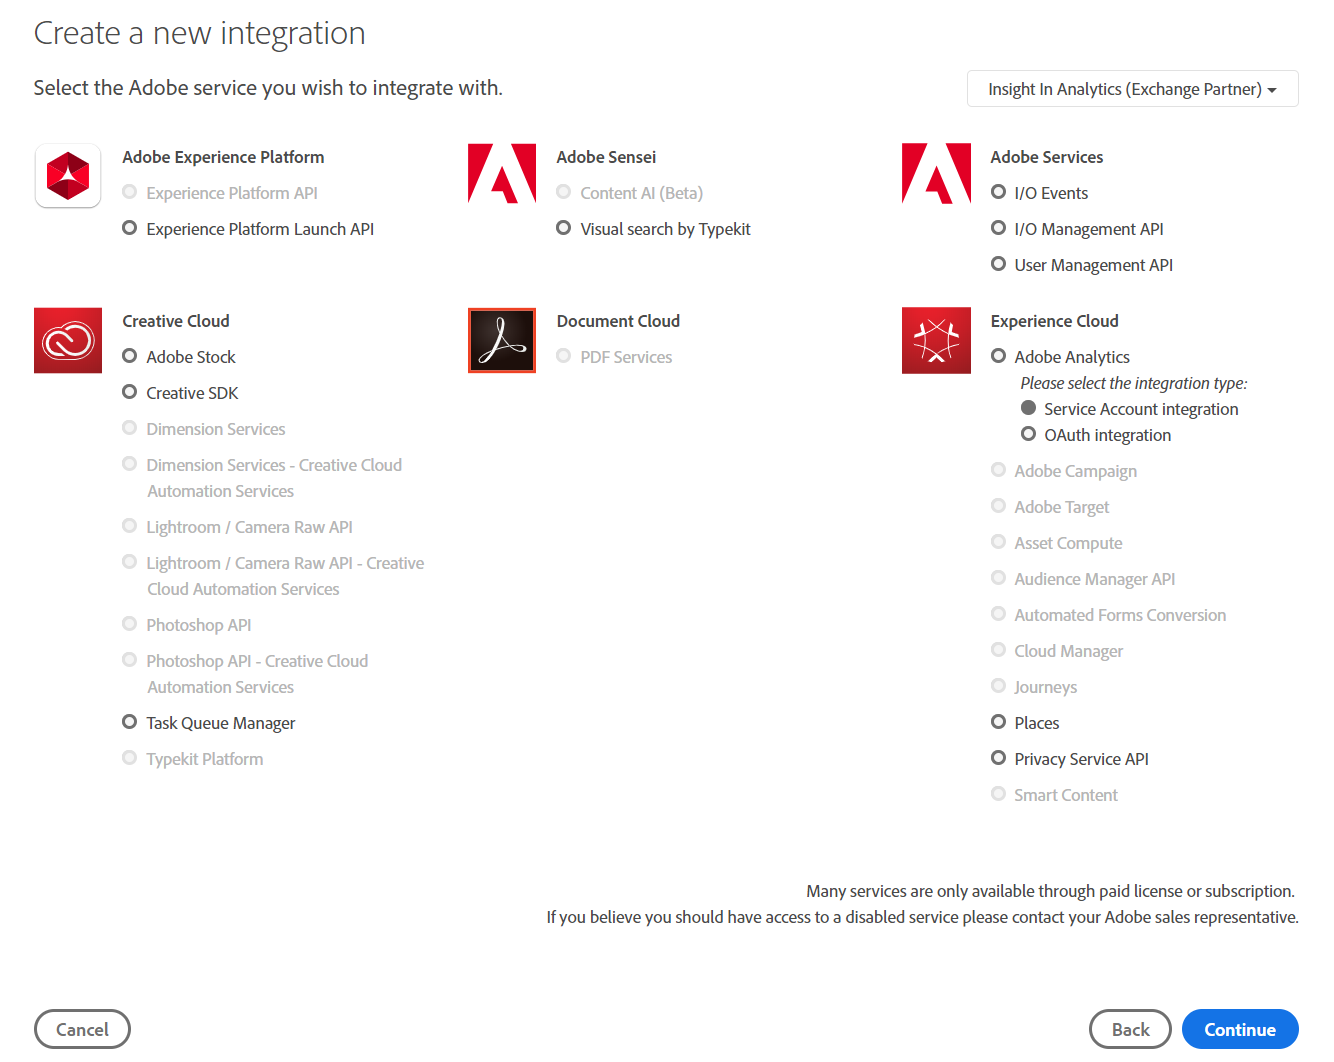
You'll be met in the next page with an array of the different Adobe services that you have access to. Under the Experience Cloud heading, select Adobe Analytics and Service Account Integration. If this option is not available to you, you might not be a Systems Administrator for your Adobe organisation - go ask your manager why they don't trust you
In the next step, you'll be asked for a name and description of your integration. You'll also need to apply an Analytics product profile to the integration, detailing the report suites, dimensions, metrics and such that the integration has access to. You can create a new one at https://adminconsole.adobe.com/ (Products > Adobe Analytics > Product Profiles > New Profile), or use any existing profile that allows the access you desire.
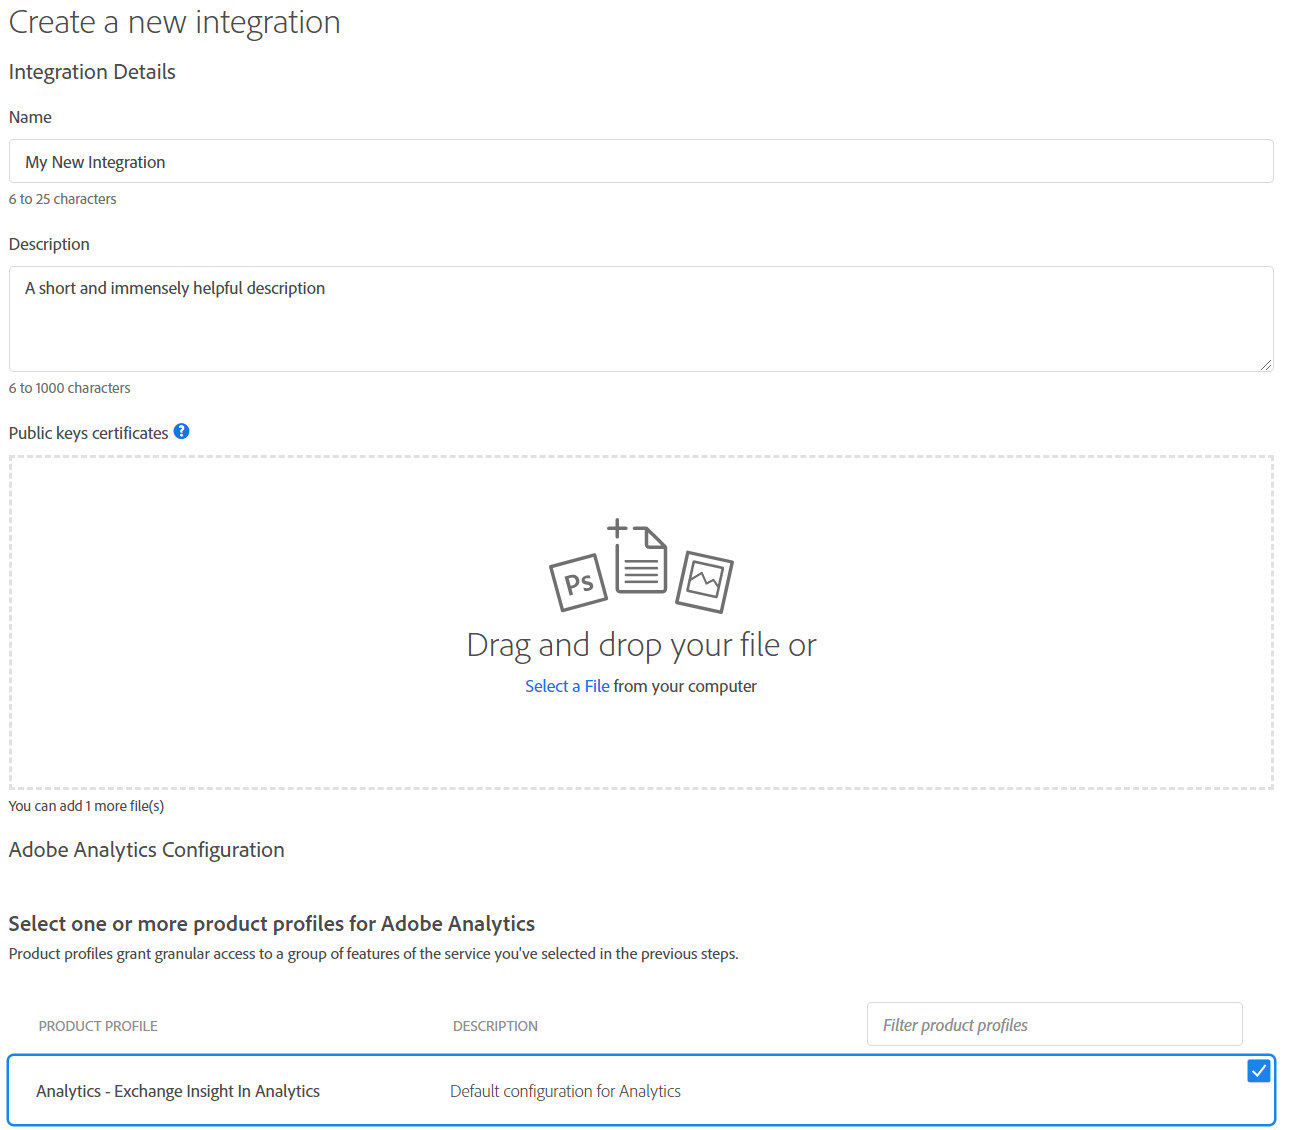
You're also required to upload your public key certificate here. Creating these in MacOS is a straightforward copy and paste into the terminal:
openssl req -x509 -sha256 -nodes -days 365 -newkey rsa:2048 -keyout adobe_io_private.key -out adobe_io_public.crt
For Windows, I'd recommend Git BASH (https://gitforwindows.org/). Go ahead and download and install that with the default options. Once completed, open the GIT > Git BASH application from the Start Menu, and when the console loads, right click and paste (CTRL-V often won't work) the same command as above.
In both cases you'll be asked to enter some information (State, Organisation...etc), which you can mostly choose to ignore. Upon completion, the command will output two files (check the location in your console to find out where) named adobe_io_public.crt and adobe_io_private.key. Take adobe_io_public.crt and upload it to your Adobe integration. If uploaded successfully, you should see it newly listed under Certificates.

Then, finally, the moment this has all been leading up to - click the Create Integration button.

Part 1 - Adobe I/O Integrations for Adobe Analytics 2.0 APIs
Comments